Through GUI
Prerequisites
- You must install management node services on the selected two servers. For installation instructions, see Install Management Node.
- Ensure both management nodes have gateway addresses on the same network segment and have consistent NIC names.
- Ensure both management nodes are running the same version.
- Ensure the operating system type and architecture are supported and both management nodes run compatible operating system types.
- Ensure both management nodes use the same license type.
Procedure
-
Log in to the UI management interface of either management node.
For a new environment that has not been initialized:
- In the Welcome to Initialization Wizard dialog, click Next. The system automatically detects the management node HA status.
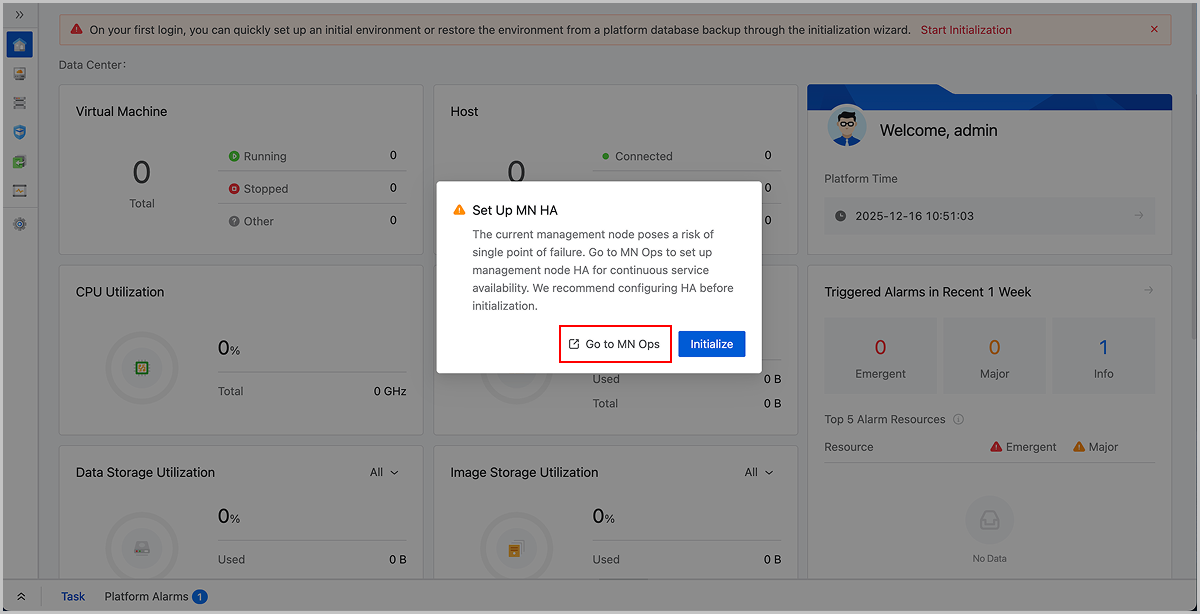
- In the Set Up MN HA dialog, click Go to MN Ops.
- A new browser tab opens displaying the MN Ops page.
For an existing environment:
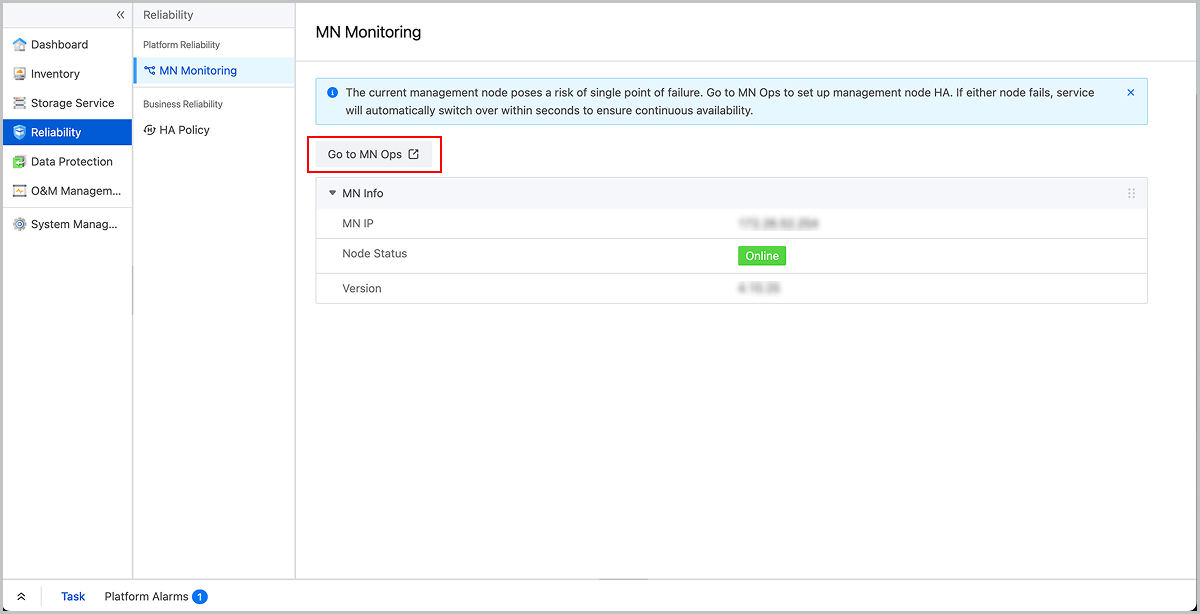
- In the navigation pane, choose Reliability > MN Monitoring.
- On the MN Monitoring page, click Go to MN Ops.
- A new browser tab opens displaying the MN Ops page.
-
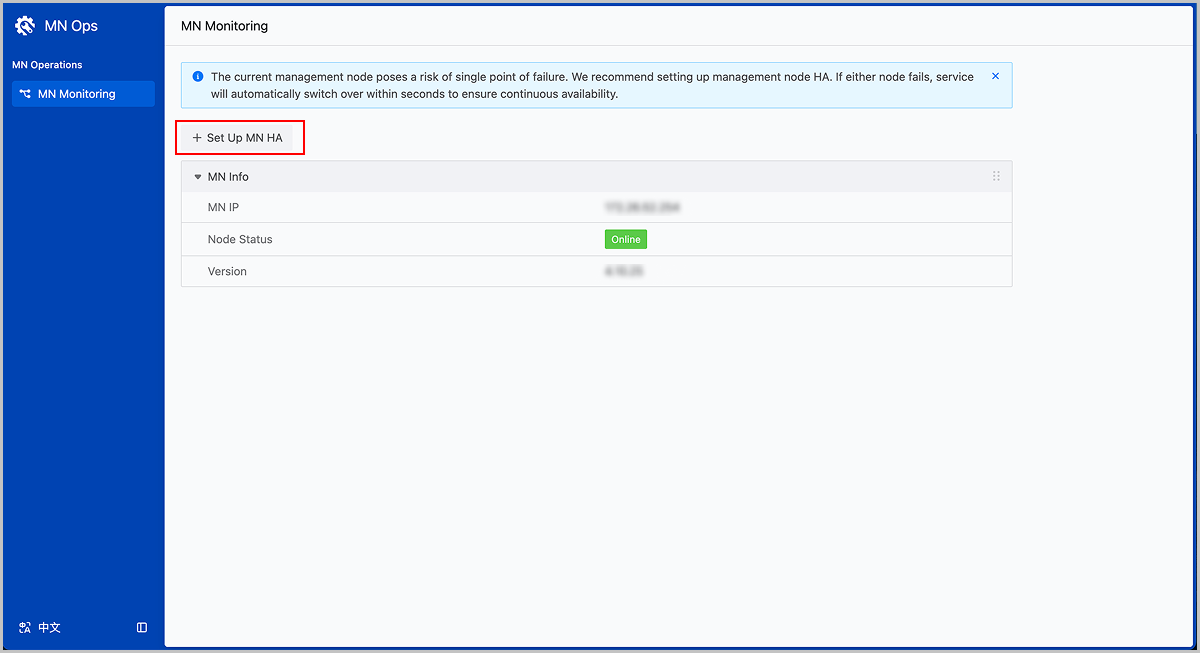
On the MN Monitoring page in MN Ops, click Set Up MN HA.
-
In the Set Up MN HA dialog, complete configuring MN, reviewing configuration, and setting up MN HA.
-
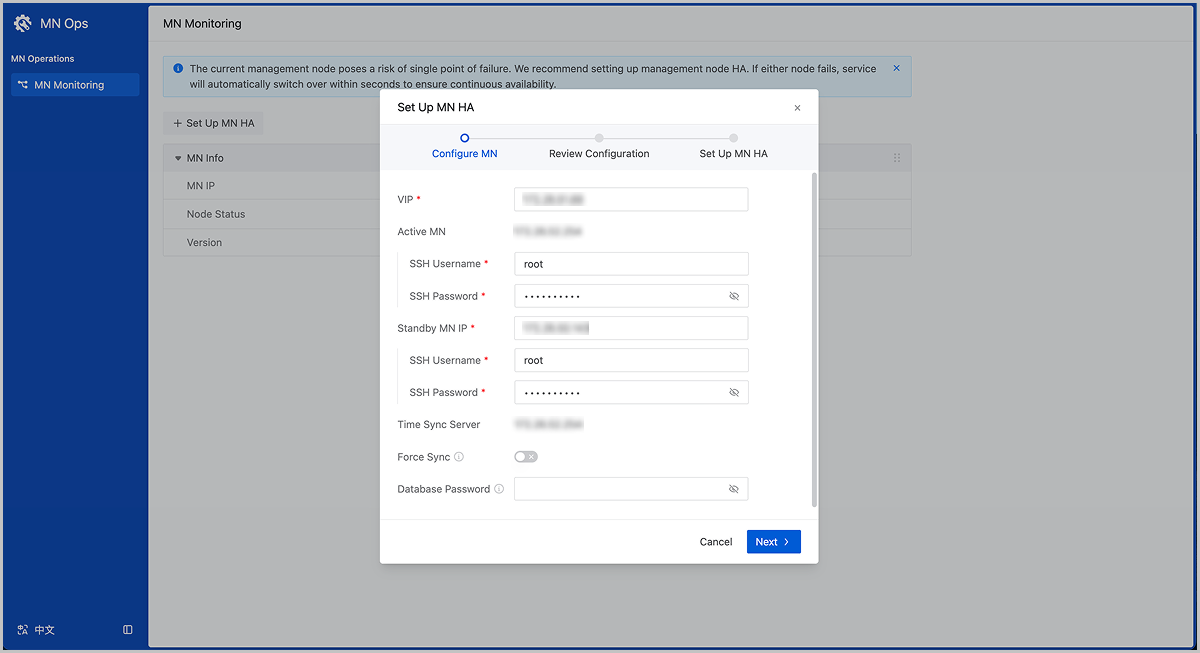
For Configure MN, set the following parameters:
-
VIP: Configure the VIP for accessing the management interface of the management node environment.
Ensure the VIP is in the same network segment as the active management node IP.
-
Active MN IP: Display the IP address of the active management node. Specify the SSH username and password for the active management node.
-
Standby MN IP: Specify the IP address, SSH username, and SSH password for the standby management node.
-
-
Note:
- Ensure the standby management node IP is in the same network segment as the active management node IP.
- When setting up management node HA, the management node password can contain English letters, numbers, and these special characters: `-=[];,./~!@#$%^&*()_+|:<>?``. If your password does not meet this rule, update it before setting up management node HA.
- Time Sync Server: Uses the active management node IP as the time synchronization server by default.
- Force Sync: Disabled by default. If the databases between active and standby management nodes cannot synchronize automatically, run the zsha2 installation command forcibly on the active management node.
- Database Password: If left blank, the initial database password will be used by default. If the password has been changed, enter the new password here.
-
Click Next.
The system automatically checks if the requirements for addition are met.
-
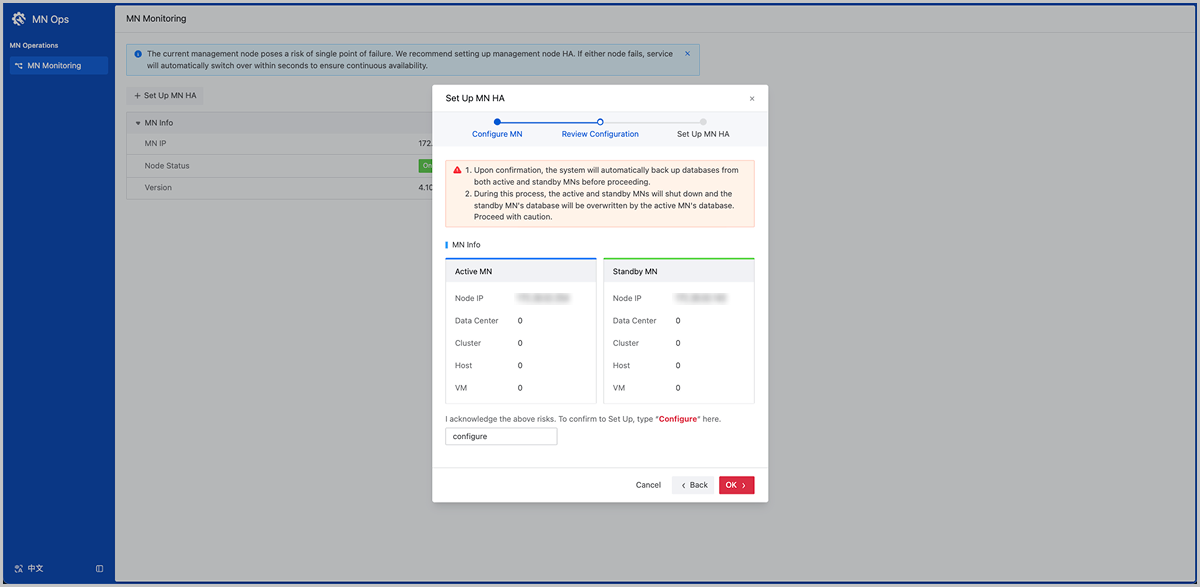
In the Review Configuration step, check the resource information of both active and standby management nodes.
Note:
-
Upon confirmation, the system will automatically back up databases from active and standby management nodes before proceeding.
-
During this process, the active and standby MNs will shut down and the standby MN's database will be overwritten by the active MN's database. Proceed with caution.
-
If you find that the standby management node contains more resources during the resource comparison, and you want to preserve these resources, we recommend that you select the Switch Active/Standby MNs checkbox. When selected, this option switches the roles of active and standby management nodes, using the resource-rich standby management node as the active management node to set up management node HA.
-
Enter the confirmation information. Then, click OK.
-
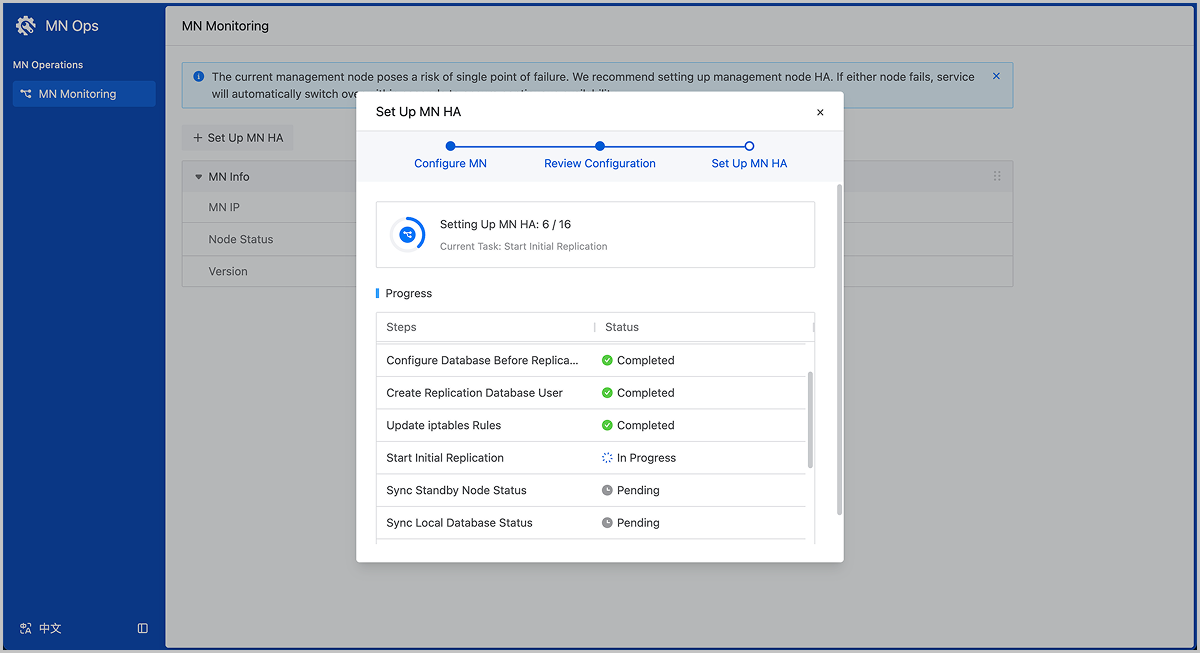
In the Set Up MN HA step, view the addition progress and task results.
-
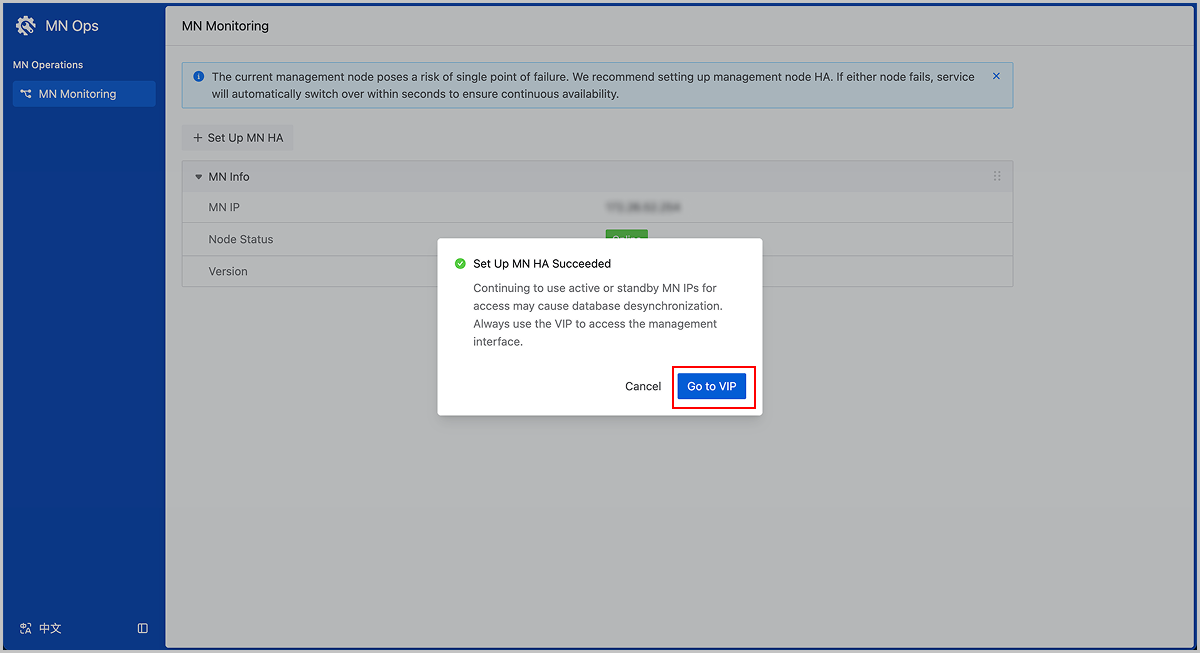
After the addition completes successfully, click Go to VIP to access the platform management interface through the VIP.